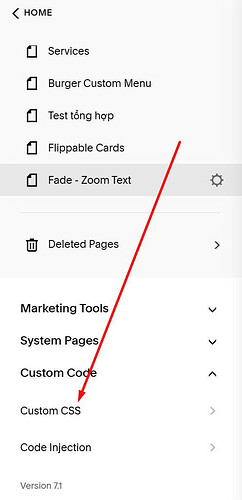
To change Blog title to custom font, you can follow these.
#1. First, you need to access Custom CSS
You can also use this free blog tool so you can customize blog easier without using code.
#2. Next, click Custom Files
#3. Next, Upload your custom font file
#4. Enter this font family code to your CSS box. And click on font file you uploaded (remember to replace Gotham Regular with your font name)
@font-face {
  font-family: 'Gotham Regular';
  src: url()
}
It will paste font file url to code. So we have exact code.
@font-face {
  font-family: 'Gotham Regular';
  src: url(https://static1.squarespace.com/static/6672ecf757a5d945cabc3965/t/667cd600ab3a1e53ea8a43f6/1719457280881/GothamCond-Black.ttf)
}
#5. Final, add this CSS code under
div.blog-item-title h1, h1.blog-title a {
  font-family: 'Gotham Regular' !important;
}


